I don’t want to study, I know everything, I’m too lazy to read… I want to go straight to «RAID0(raid0) configuration on hetzner» — skip useful knowledge, scroll down to the section called «…)
Short excursion
When we talk about servers, we often come across terms that seem complicated. One such term is RAID. Let’s figure out what it is, but without complicated words, so that even a child could understand.
Arrays — What are they?
Imagine you have a toy box. You can put one or several toys in it to keep them together. In this way, you have created an «array» of toys.
Independent Disks — What does it mean?
Imagine you have several books. Each book is its own story, and they are independent of each other. In RAID, there are also «independent» disks, like separate books.
Why do we need RAID on a server?
When we want our data to be safe, like the stories in your books or the toys in the box, RAID comes to the rescue. It allows us to make copies of data and store them on different disks.
RAID (Redundant Array of Independent Disks) is a technology that combines multiple physical hard drives into a single logical unit to improve performance, reliability, or both. It allows you to use multiple disks as if they were one, which can be beneficial in various scenarios.
Basic RAID types:
- 1) RAID 0 (Striping): Data is distributed across two or more disks, increasing performance. However, failure of any one disk results in complete data loss.
- 2) RAID 1 (Mirroring): Data is duplicated on two disks, creating a mirror image. This provides high reliability, as data is preserved if one disk fails.
- 3) RAID 5 (Block-level striping with parity): Data and a portion of «parity» information are distributed across three or more disks. If one disk fails, data can be reconstructed from the parity information.
- 4) RAID 10 (Combination of RAID 1 and RAID 0): This is a combination of mirroring and striping. Data is duplicated on multiple disks for both high reliability and performance.
- 5) RAID 6 (Block-level striping with double parity): Similar to RAID 5, but with two parity blocks, allowing data to be recovered after two disk failures.
RAID is used in servers and data storage systems to provide reliability and efficient use of disk space. Different RAID levels offer different balances between performance, reliability, and the amount of available storage.
Authentication (KYC)
Before setting up RAID 0 on Hetzner, you need to register and authenticate on the website. Authentication involves verifying your identity (you will need to send a scan of your passport) — in other words, KYC. Ukrainian or Russian passports may not pass the verification, so it is better to use a foreign passport or a driver’s license.
Authorization on the hetzner website
Let’s go to the official website.
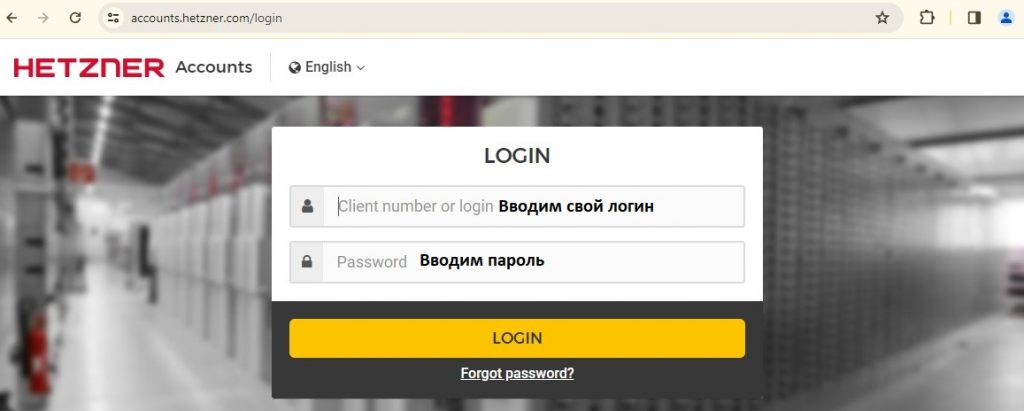
We choose English (for those who prefer German, choose German). «Language» -> select «Deutsch» or «English».
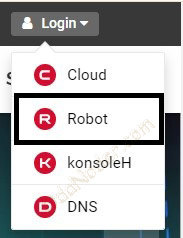
Click «Login» -> select «Robot«

Control panel for dedicated servers «ROBOT»
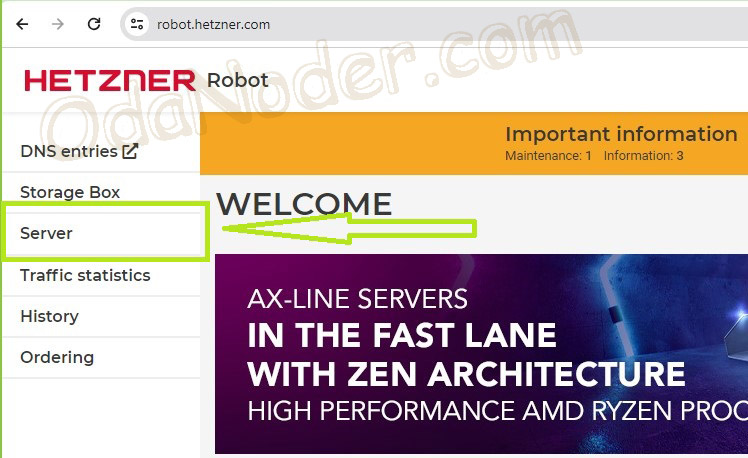
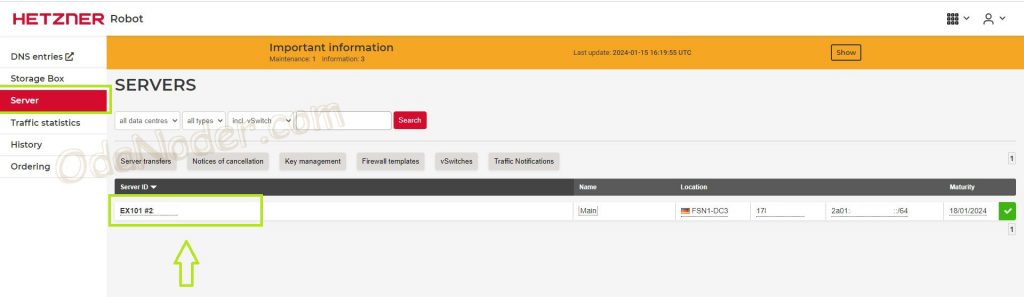
Here we will begin our journey of configuring the server. First, we need to choose the server we are interested in. To see a list of existing servers that we have, you need to click on the «Server» menu item, the tab on the left. In our case, we have one ordered Dedicated Server.
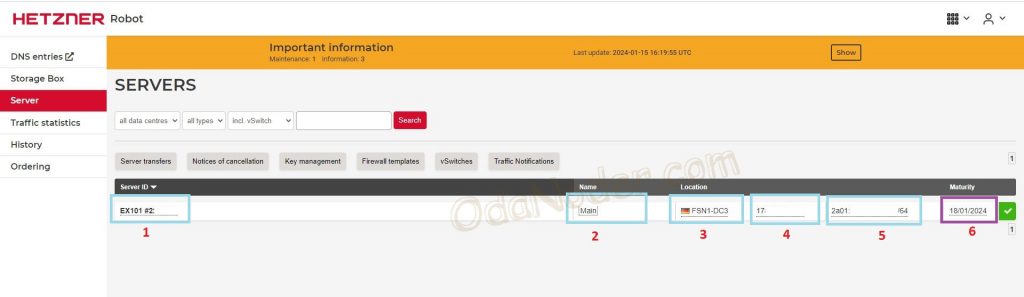
Image Description Hetzner Robot -> Server
Server version (EX101 in our case) and order number.
You can set a server name here. It will only be displayed in the control panel and is used as a note. Do not confuse it with the actual server name.
The location of our server in the data center.
IP address in IPv4 format.
IP address in IPv6 format.
The date the dedicated server was ordered. The beginning of the billing period. On this day next month, the server will be charged.
Control panel for dedicated servers — internal settings
Next, we need to go to our server settings. We will see a fairly wide variety of settings. We will only be interested in a few of them. Namely, «Reset» and «Rescue«.
Reset — will be used to reboot our server.
Rescue — is used to reset and enter alternative mode.
Reset
A reset typically refers to restarting a server or virtual machine. When you perform a reset, all the running processes on the server are terminated, and the operating system is rebooted. This can be useful if you’re experiencing issues with the server’s performance and want to try starting fresh.
Rescue
Rescue mode typically provides you with access to the server through an alternate environment, which allows you to perform various operations without booting into the main operating system. This can be useful, for example, if you have forgotten your password to access the server, or if your files or configurations are damaged and you want to make changes from outside the system.
Rescue Menu Tab
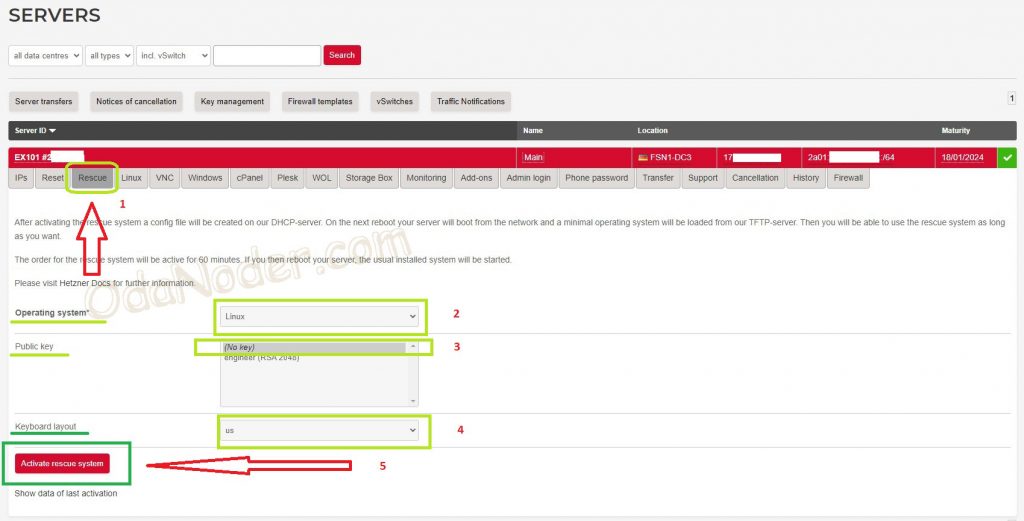
1. Click on the «Rescue» tab to open the menu.
2. Operating system: The default is «Linux», which we will use. If another operating system is selected, click the arrow on the right and choose the desired one.
3. Public key:
(No key): Select this option if no public key is specified.
engineer (RSA 2048): This is a public key used for user authentication. It is for experienced users and we will not need it for now.
4. Keyboard layout: Select «us» for the English keyboard layout. This will be used during the work inside the shell.
5. Activate rescue system, show data of last activation: Clicking this button will provide you with the password and login (default: root) for the user to authorize on the server after its reboot.
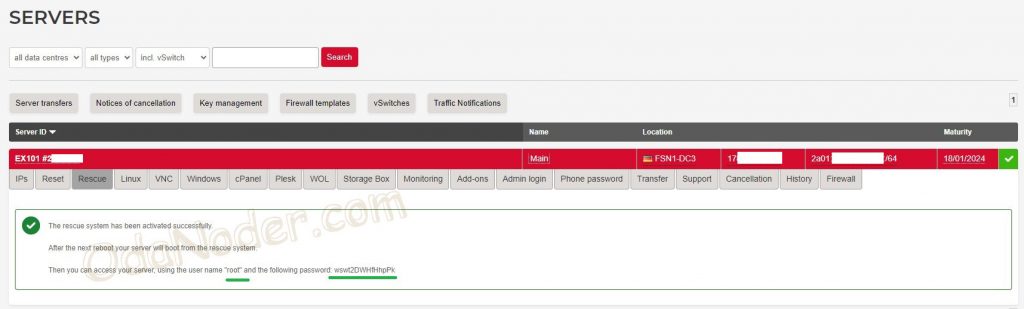
After clicking the «Activate rescue system» button, the page will refresh and we will be presented with a username and password. Save this information in a text document. We will need it to log in to the alternative recovery mode.
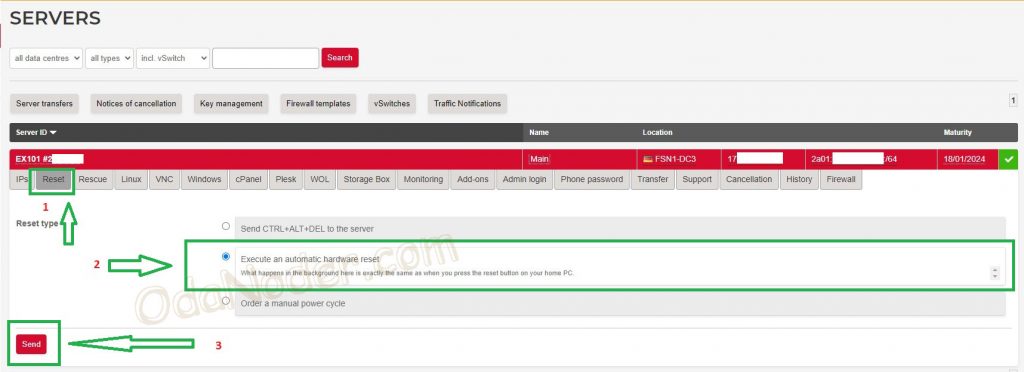
After we have saved the login details:
1. Go to the «Reset» tab.
2. Select «Execute an automatic hardware reset».
3. Click on the «Send» button — this confirms the request to reboot the server.
At this point we finish working with the hetzner control panel and go to the command line. For this we need any ssh client.
We connect to the server with an ssh client. The example uses PuTTY
What is an SSH client?
An SSH client is a program or utility that allows users to connect to remote servers using the SSH protocol. SSH clients provide a secure connection and allow users to interact with the remote machine as if they were sitting right in front of its terminal.
Connecting to a server using PuTTY is a relatively simple process. Here are the steps involved:
1. Download PuTTY: You can find it on the official PuTTY Download Page.
2. Install PuTTY: Run the installer file that you downloaded and follow the instructions in the installation wizard.
3. Open PuTTY: After installation, launch PuTTY. You will see a window with the title «PuTTY Configuration».
4. Configure the connection:
Enter the IP address or hostname of the server in the «Host Name (or IP address)» field.
Specify the port (usually the SSH port is 22).
Make sure the protocol is set to SSH.
5. Optional: Save the settings. If you want to save the settings for future use, enter a name for the session in the «Saved Sessions» field and click the «Save» button.
6. Connect: Click the «Open» button to establish the connection. In the opened window, you will be prompted to enter the login (usually your username on the server) and password. When connecting for the first time, PuTTY may offer to save the host key for security purposes. Agree to this.
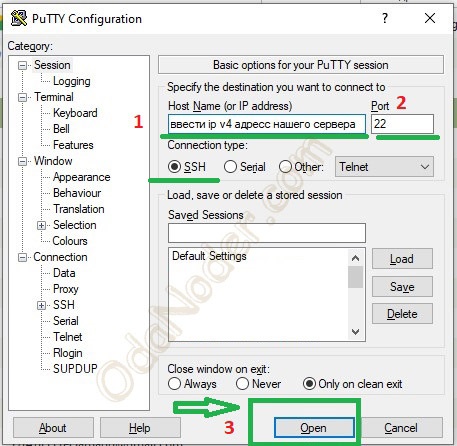
Let’s continue connecting.
1. In the «Host Name (or IP address)» field — enter our ip address v4.
2. «Port» should be «22» by default. We check the connection protocol, it should be “SSH”.
3. Press the «Open» button
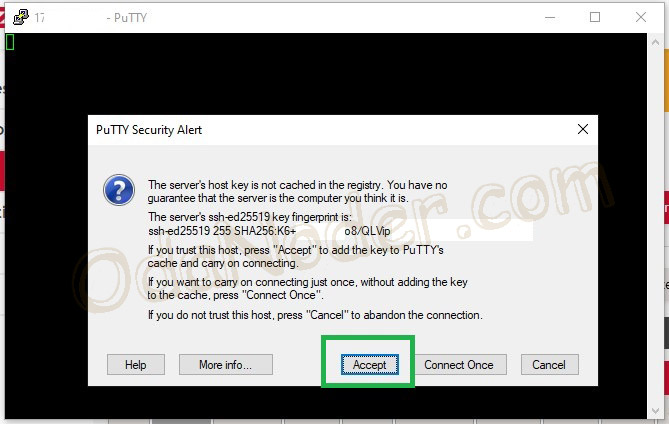
A window appears in front of us in which the ssh client offers to save the host key for security. We agree by clicking on the «Accept» button.
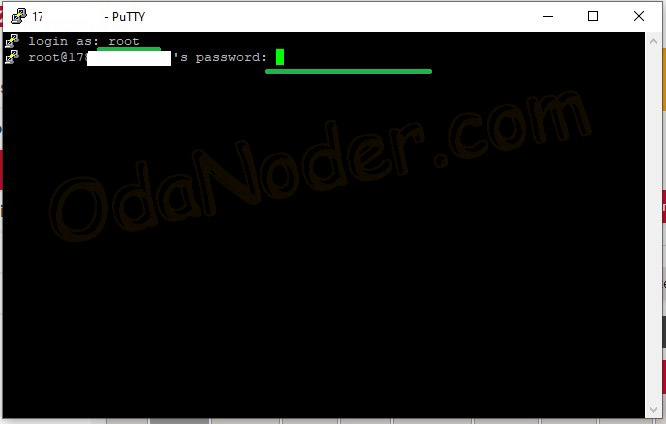
Next, we enter the login and password. Remember: we saved the login and password earlier when we performed actions in the «Rescue» tab (hetzner server control panel). When entering the login, we will see what we are entering. For security reasons, when entering the password, we do not see what we are entering. Therefore, there is no need to panic if nothing is displayed after entering the password. I think at the basic level you already know how to use the PuTTY client — if not, look for video tutorials on YouTube, there are enough of them there.
Installing and configuring RAID 0 on a dedicated server (Dedicated Server) Hetzner
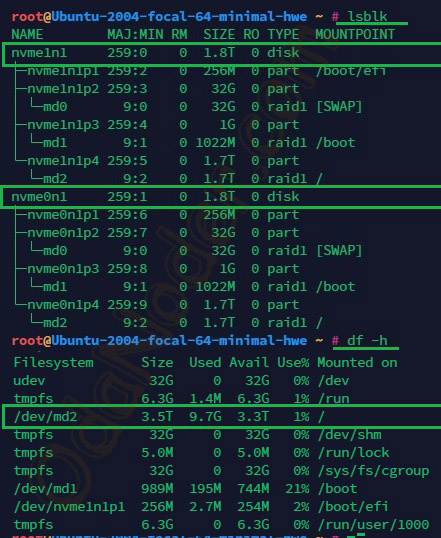
Now we are connected to our remote server and can start configuring RAID 0. First, we need to check how many disks we have on the server. To configure RAID 0, we need at least 2 disks of the same model and manufacturer. The commands for checking the number of disks are shown below. We will need two commands: «df -h» and «lsblk«.
In Linux, the commands «df -h» and «lsblk» are used to obtain information about disk space and block devices on the system. Let’s look at the purpose of each of these commands:
«df» stands for «disk free» and is used to display information about available disk space on file systems. The -h option stands for «human-readable» and makes the output more human-friendly.
df
Purpose:
«df -h» displays information about the size of file systems, the used and free space, and the percentage of usage for each mounted file system.
Пример вывода df -h:
Filesystem      Size  Used Avail Use% Mounted on
/dev/sda1        20G   8.2G   11G  43% /
/dev/sdb1       100G  20G   80G  20% /data
The «lsblk» command is used to display information about block devices, such as hard drives and storage devices. This command provides information about partitions and their properties.
lsblk
Purpose:
«lsblk» displays a tree-like view of block devices and their relationships, including information about size, type, and mount points.
Пример вывода lsblk:
NAME   MAJ:MIN RM   SIZE RO TYPE MOUNTPOINT
sda      8:0    0   20G  0 disk
└─sda1   8:1    0   20G  0 part /
sdb      8:16   0  100G  0 disk
└─sdb1   8:17   0  100G  0 part /data
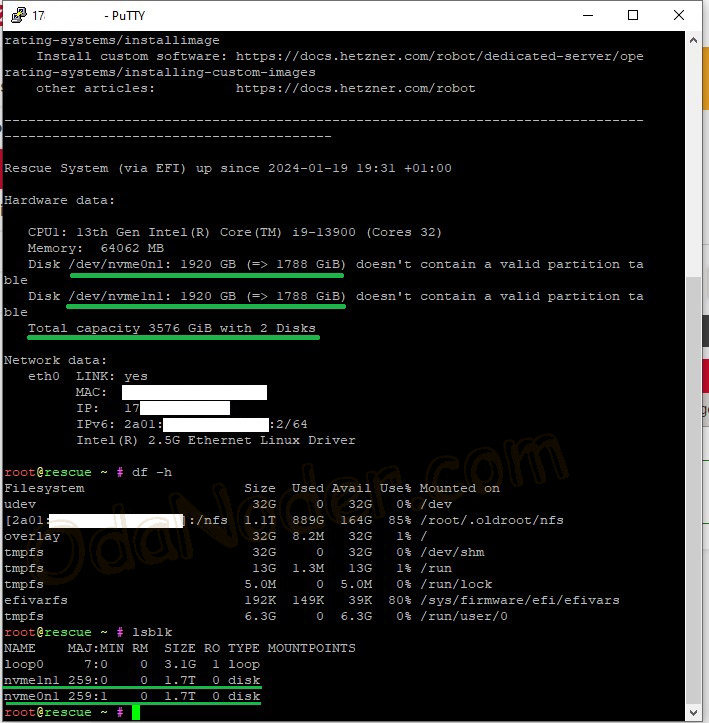
Our Example. Below is an image of our server. What do we see? We have 2 hard drives («nvme0nl» and «nvme1nl«): the nominal size of each drive is 1920 GB, and the actual size is 1788 GB. The name «nvme0nl» — yours may be slightly different, but the meaning remains the same.
Now that we have figured out the number of disks (at least two), we can move on to the next step. We need to enter the «installimage» command.
installimage
The installimage command in Hetzner is designed to install an operating system (OS) on a dedicated server. It is used to automate the process of installing and configuring the OS on Hetzner servers.
The main parameters of the installimage command can include the following:
Operating System (OS): You specify which operating system you want to install. For example, Debian, Ubuntu, CentOS, etc.
Disk Partitions and Filesystems: You define how the hard disk will be partitioned and choose the filesystems for each partition.
Network Settings: You can configure network parameters such as IP address, gateway, subnet mask, and DNS servers.
User Settings: Some additional parameters, such as RAID configuration, LVM configuration, additional packages to install, etc.

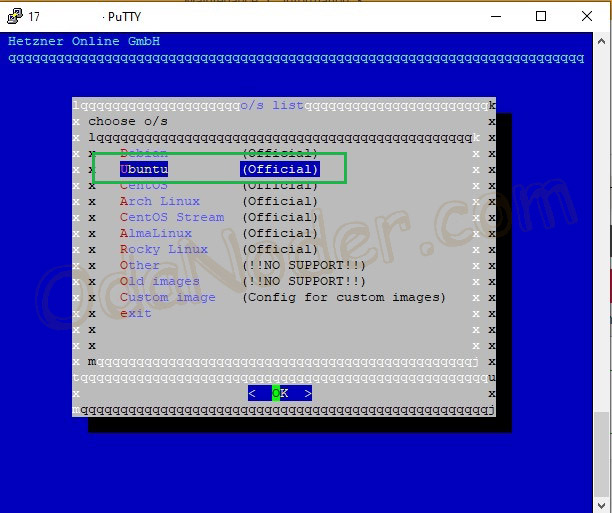
After executing the «installimage» command, we are presented with a choice of operating system that will be automatically installed. In our case, we will take the most common operating system option, «Ubuntu«. We use the up and down arrow keys to select it.
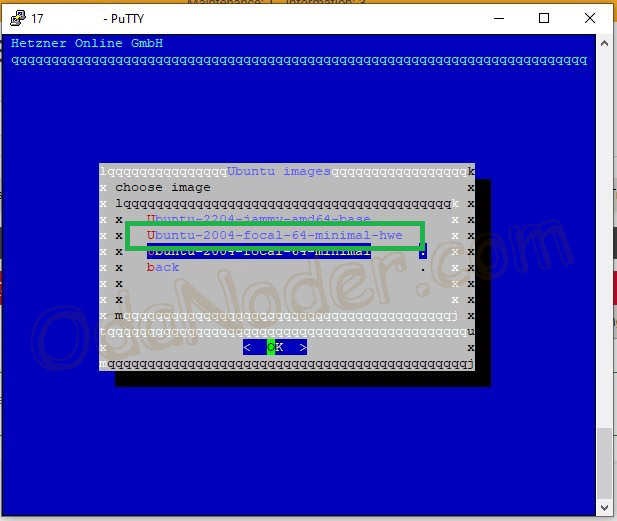
After selecting «Ubuntu», we need to select the desired version. The version we chose is circled. Use the up and down arrows on the keyboard.
We agree and continue.
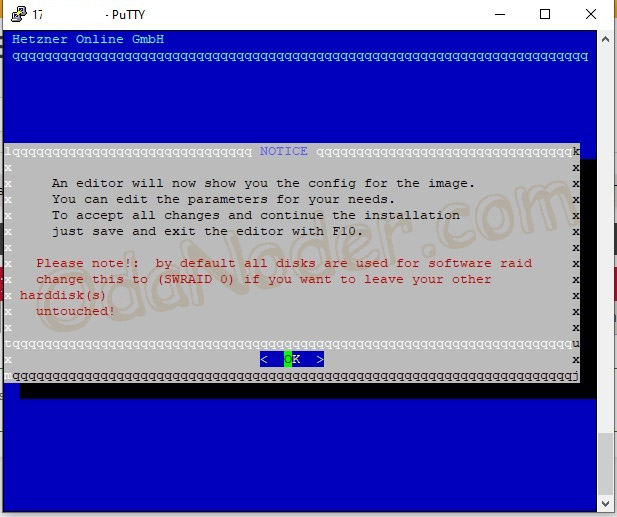
Finally, we get to the configuration file. In it, we find 2 parameters: «SWRAID» and «SWRAIDLEVEL«. We need to set the following parameters: «SWRAID 1» and «SWRAIDLEVEL 0«. Below is an example of how it should look.
## ===============
##  SOFTWARE RAID:
## ===============

## activate software RAID?  < 0 | 1 >

SWRAID 1

## Choose the level for the software RAID < 0 | 1 | 10 >

SWRAIDLEVEL 0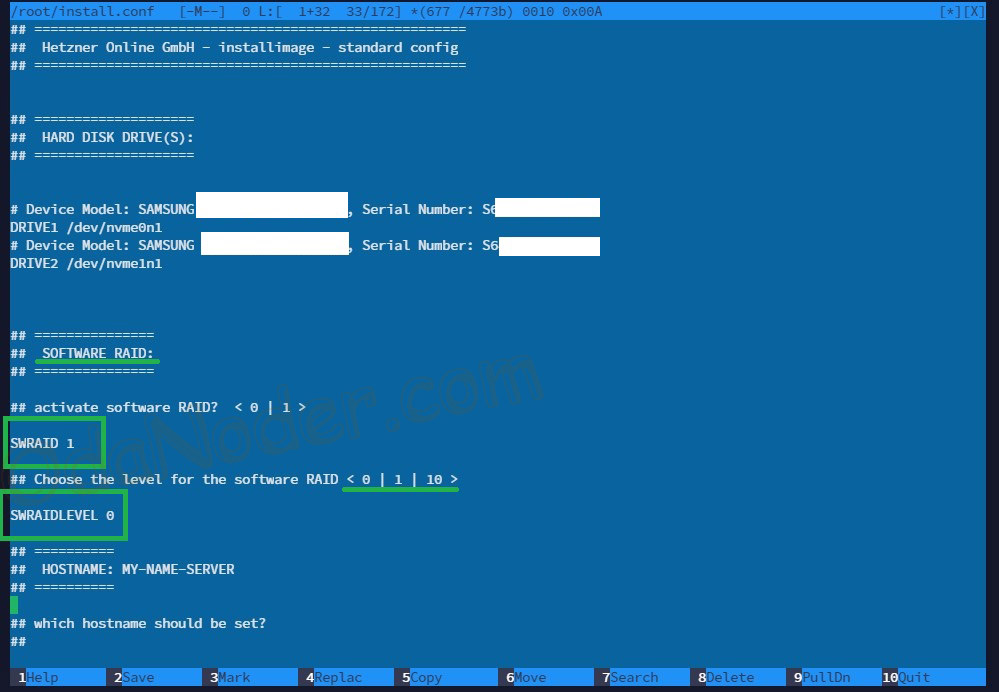
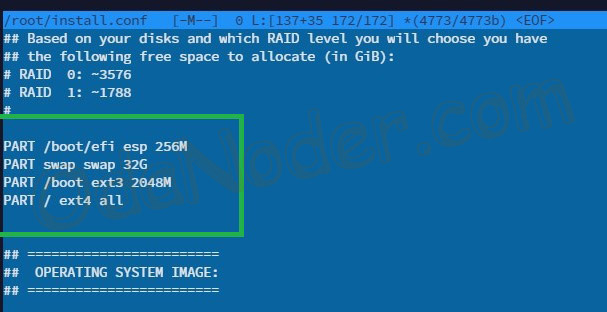
Optional. If we want to tweak the server parameters a little, you can correct them in this block.
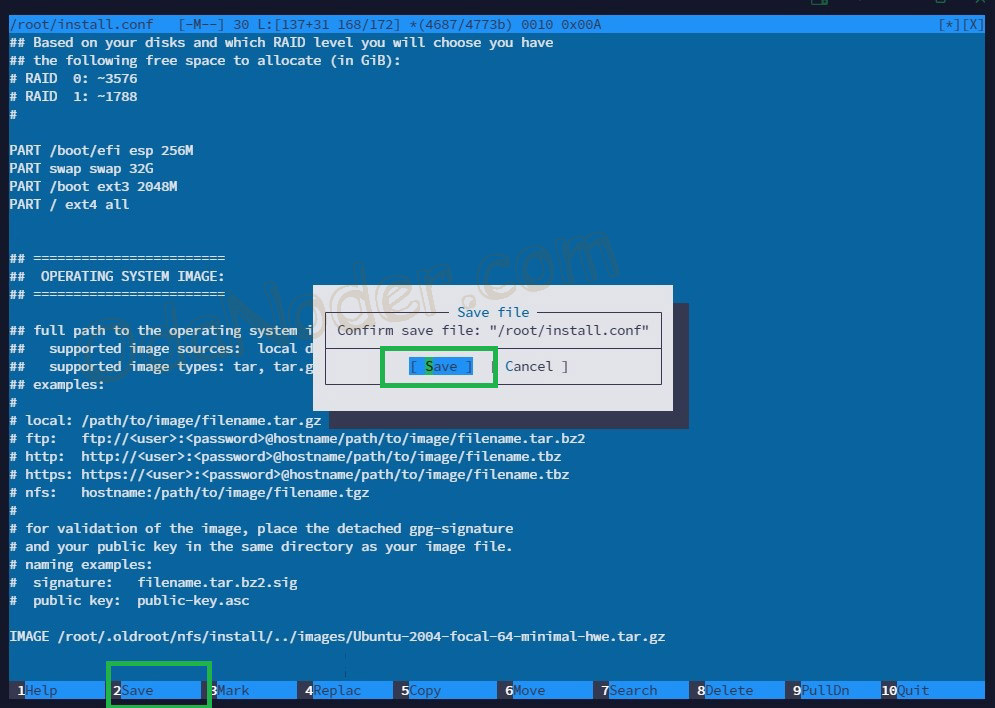
We have already configured everything we need. So now we press the “f2” key on the keyboard and then the “f10” key.
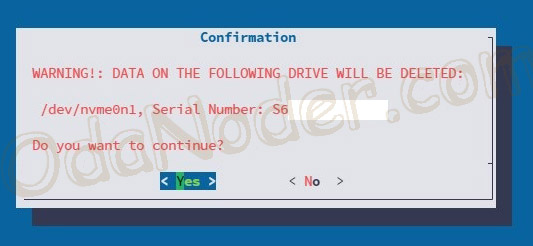
There are only a few steps left. We agree twice (we have 2 disks) and enjoy the process.
The process has started. Takes about 5-15 minutes.
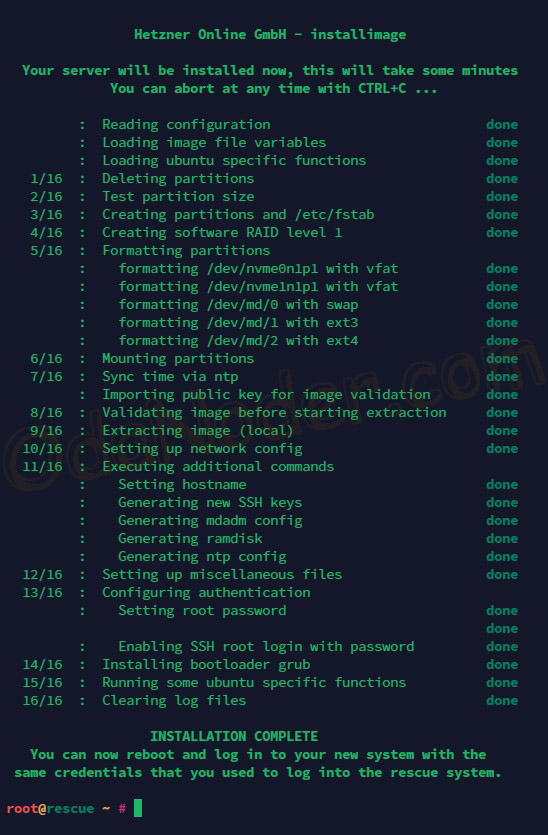
After completing the process, we enter the command «reboot» — to reboot the server. It will reboot for 1-4 minutes. It depends on the server’s characteristics. After that, we reconnect to the server using an SSH client (we already know how to do this — see above). We check the size of the disk. And lo and behold!!! We did it!!!